Now that you have a foundational understanding of the capabilities of Marketing Cloud Journey Builder, it’s time to dive into the beginning stages of building your customer journeys.
In this chapter, you’ll learn how to:
Before you get started in Journey Builder, you need to first understand the purpose of each customer journey you’re about to create. To do that, you must create a plan of action.
Download our Salesforce Marketing Cloud Journey Builder: The Essential Guide to maximize your marketing automation platform.
Because customer journey builders have so many possible configurations, it can be easy for an inexperienced user to create ineffective campaigns. That’s why we suggest you identify your goal, contacts, and how you’ll interact with these people within your journey before getting started in Journey Builder.
To build a customer journey, you should follow these steps:
Journey Builder defines a goal as a measure of the customer action you want to promote. This can be anything from purchasing items from your mobile app to opening up an email within a certain timeframe.
When setting goals, it’s best to only choose one goal throughout the journey. That way, you can keep your customer journeys focused and optimized.
In Salesforce Marketing Cloud, an entry source determines who is going to be injected into your journey. You can choose to admit people based on if they meet your criteria or if they perform a certain action (such as making a purchase). We’ll elaborate more on entry sources in Chapter 3 of our Journey Builder Guide.
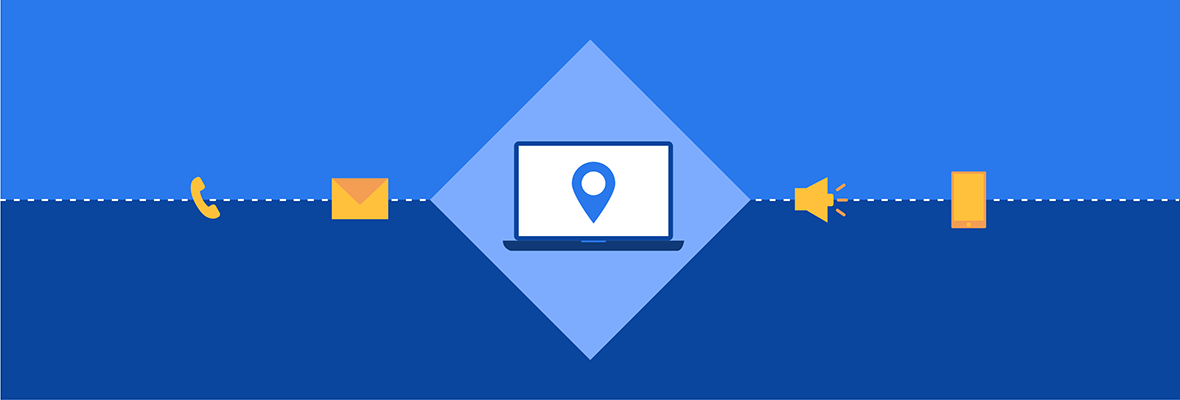
A message activity is how you’ll directly interact with your contacts — whether it’s through emails, text messages, or even a display ad on Google.
Because Journey Builder is not a standalone product, you’ll have to purchase the studio that corresponds to your goals — if it’s not already included in your Marketing Cloud edition. For example, you’ll need Mobile Studio to send text messages from Journey Builder. We’ve outlined all the various studios and builders in a previous post.
Flow controls determine how your contacts move through the journey based on the logic you configure. You can choose to make them wait awhile before moving onto the next activity, or you can even choose to split up your contacts based on their actions. We’ll dive into the different types of flow controls and best practices for each setting in Chapter 5 of our Journey Builder Guide.
Now that you know how to plan for a customer journey, it’s time to actually start building your journeys on the Journey Builder canvas.
It’s time to start up Journey Builder and explore the Journey Builder canvas. The canvas allows you to build a customer journey and visualize exactly how each of your contacts go through the journey.
If you want to build journeys from scratch, you need to understand the different building blocks of a journey and what they look like:
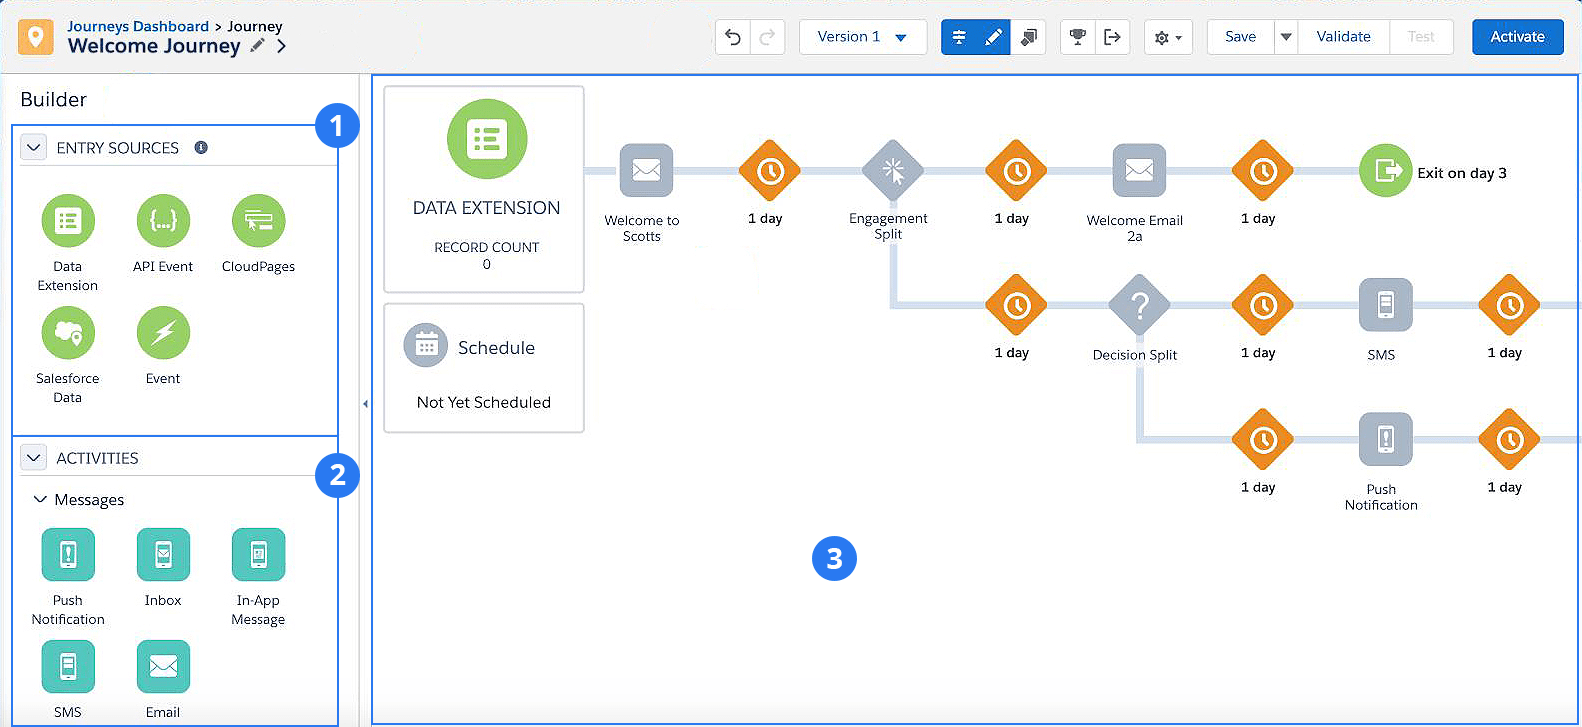
Every journey created in Journey Builder will only have 1 entry source and at least 1 canvas activity. You can utilize flow controls to trigger a next step in a journey and make sure you’re giving the contacts enough time to engage. Otherwise, you risk contacting them too frequently and irritating them.
If you’re not looking to build a customer journey from a blank canvas, Journey Builder also has pre-built journey templates for you to take advantage of. You can modify these templates to fit your business’ needs.
Marketing Cloud’s Journey Templates allow you to customize a prebuilt journey based on common journey goals — such as a welcome journey or an abandoned cart journey. While some users prefer to create their journeys from scratch, we recommend beginners explore these templates to see what a journey in action could look like.
Salesforce has labeled these templates based on complexity levels: simple, intermediate, and advanced.
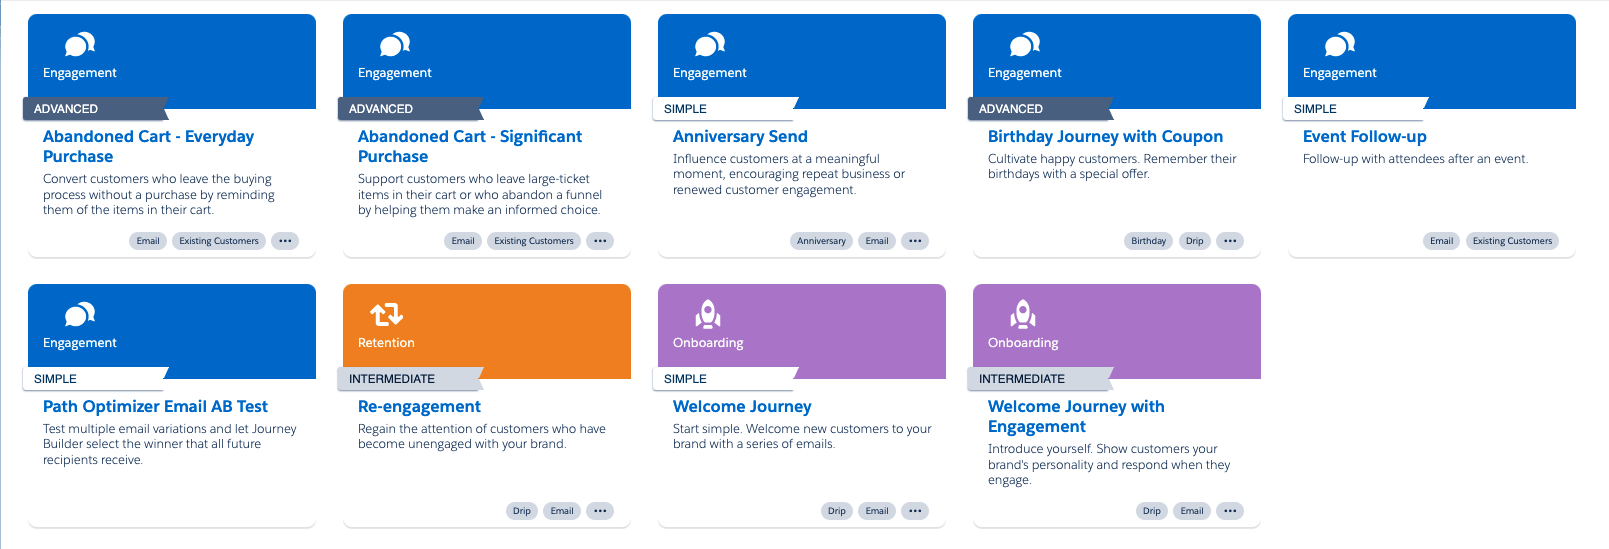
In Journey Builder, you can choose and modify from the following templates:
It’s time to dive into each template and their respective assets required to run these journeys. As mentioned earlier, these templates can be customized to meet your goals.
This journey is designed to remind customers who added items to their cart but chose to leave the page without purchasing. The abandoned cart for everyday purchase can retarget your existing customers in an online retail space.
This journey allows you to create 2 unique emails that are designed to remind your customers of your product’s value. That can be anything from a simple reminder email to an email with a free shipping offer.
This journey is designed for customers who leave big ticket items in their cart — such as insurance, electronics, or even jewelry. Because these customers typically require more time to consider your product before purchasing, you’ll want to provide more educational content to convert these customers.
To use this template as default, you’ll need to create 3 emails that educate your customers on the benefits of your product. These emails may include detailed copy that provides more information about your product or a reminder email that they still haven’t purchased the product.
This journey helps strengthen your relationships with your customers by reminding them of a special milestone — such as an anniversary of their sign-up date. The anniversary send journey targets your existing customers and serves as a single-send reminder of the event.
To use this journey, create 1 email that reminds them of this special date and motivates your contacts to engage again. You’ll also need to use a Date Based Event as your entry source.
This journey helps your customers celebrate their big day with a birthday coupon. To use this journey, you’ll need to have your contacts’ birthdays stored in your data to use as an entry source.
You can reach your contacts through 4 emails, with each email celebrating their birthday with a ready-to-use coupon. Using this template, you can create the initial offer, reminders, and even a follow-up after their birthday purchase.
You can also track coupons redemptions through this customer journey. Once your contact uses their birthday coupon, you’ll be able to stop your journey from sending unnecessary reminders.
This journey helps you follow-up with customers who attended an event using emails.
You should create 2 emails expressing your gratitude for their attendance with a CTA that inspires them to take the next steps, such as a feedback form or an email promoting your upcoming events.
We recommend sending the first message a day after the event is over to make sure your attendees do not forget any details and to keep them engaged while you’re still top-of-mind.
This journey uses A/B testing to help you determine the best email that boosts conversions based on metrics, such as open rates and click rates.
It’s best practice to only test one variable at a time to make sure you’re getting meaningful results — such as the subject line, an image within the email, or the CTA. Content Builder emails can be customized inside Journey Builder to create multiple versions of these emails.
The journey sends either variation to a portion of your contacts and measures the engagement. Based on the results, Journey Builder can automatically select the highest performing path for the remaining contacts. You can manually select which path you’d like to send contacts through after the test as well.
This journey not only helps you remind your disengaged email subscribers of the value of your product, you can also use this journey to identify and automatically unsubscribe disengaged email addresses after the journey. This will help improve the hygiene of your email lists.
You can create 3 trackable emails that can give you insight on your email subscribers’ engagement level. These emails can be anything from telling your contacts about your new products, offering a discount code, to even prompting customers to reconfirm their interest in remaining subscribed to your emails.
The simple welcome journey is a drip email campaign targeting your new customers. It helps introduce your brand to these customers through a series of emails.
To use this journey, you can create 3 emails designed to help new customers get familiar with your company and products. You can do this by emphasizing what makes your company unique or by giving a sneak peek of what your readers can expect from you.
Just like the simple welcome journey, this welcome journey is a drip email campaign that helps you introduce yourself to your new customers. However, you can use this intermediate version to react to the actions they’ve taken with your emails — such as an open or click.
To use this template, you can create 5 emails with tracking to gauge your recipients’ engagement level. The emails should help onboard your customers by welcoming them and highlighting the value of your products. Contacts can receive different messages based on whether they open or click inside an email.
These templates are meant to give you inspiration on how you can use Journey Builder. And once you’ve finished creating multiple journeys, you’ll find them all in your Journeys Dashboard.
The Journeys Dashboard is the first you see when you navigate to Journey Builder in Marketing Cloud. It’s an overview of all the journeys you’ve created. Once you open up the Journeys Dashboard, this is what you’ll see:
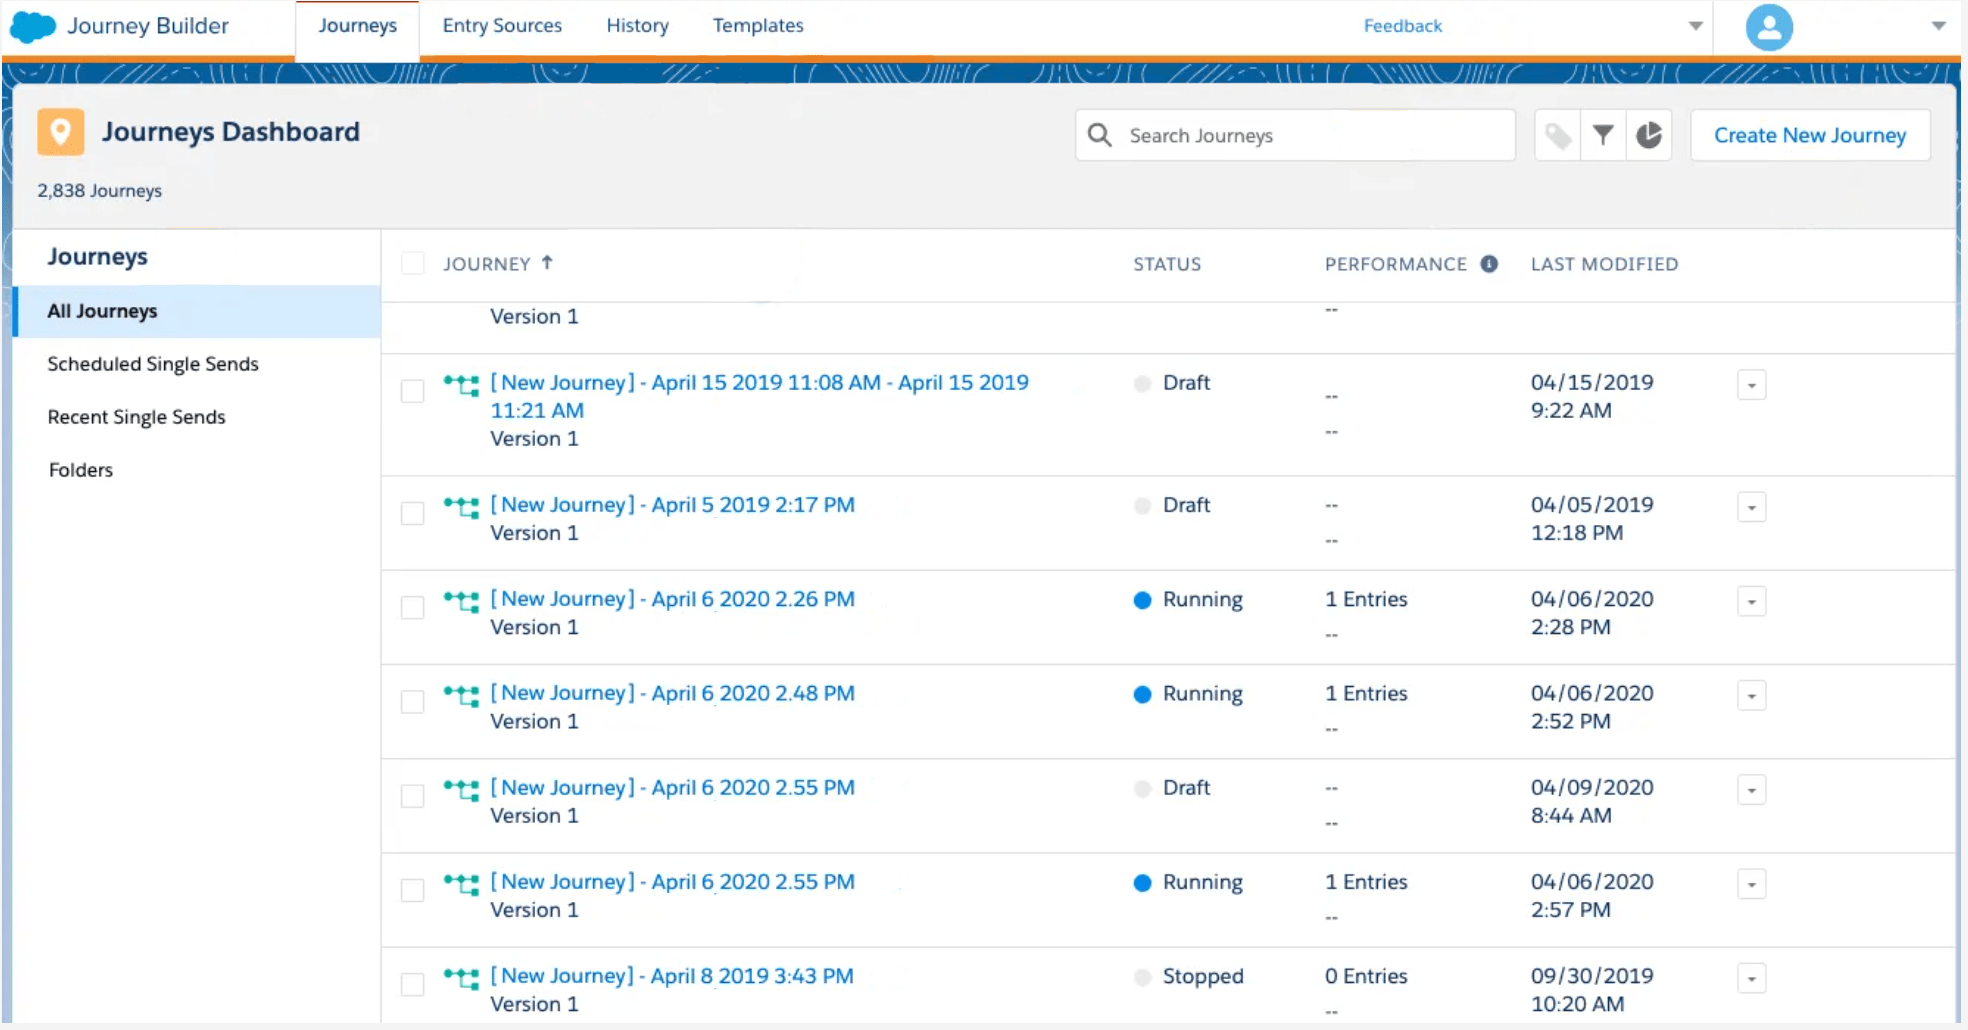
Because the dashboard will display every customer journey you’ve ever created, it’s important to learn how to utilize the Journeys Dashboard’s filters to find the journey you’re looking for.
You can sort these journeys based on the following attributes:
You can also even search for your journeys manually. Make sure you are consistent with naming conventions; it’ll keep your Journey Builder organized especially as your list of journeys grows.
This chapter focused on everything you needed to know before creating your first customer journey within Journey Builder. Because Journey Builder is such a flexible tool, it’s important to create a plan ahead of time to keep your journeys focused on your goals.
After reading this chapter, you should know:
All customer journey templates use emails, so we recommend brushing up on the best practices for effective email marketing design. Not only will it inspire conversions, it’ll also help you create beautifully branded emails that highlight the value of your business.